Showing posts with label framing cross stitch. Show all posts

Monday, June 12, 2017

A Framing Refresher

I've had a few requests to give the instructions for how I frame my cross stitch, especially after I finally framed my Kitty Kalendar a few months ago. So I placed my order to American Frame for supplies to complete "Quaker Star" by Bent Creek. This is a project I stitched maybe three years ago and it had been in the "finished stitching" box just waiting for the day when I would display it. This is a pretty picture-heavy post, so be forewarned.

I chose a whitewash frame and a narrow red mat. Also in my order was a piece of foam core board for mounting. When ordering your framing supplies, measure and measure again to make sure that you're allowing enough space to accommodate your stitching.

Now here's how I do my framing. First of all, I center my stitched piece as best as I can, measuring as I go, and then I start pinning. I use silk or satin pins (about 1") that you can get wherever sewing notions are sold.
I start out placing the pins about 1" apart, but will add more to tighten everything up. At this point you will notice that I didn't put any batting or anything on the foam core board like a lot of framing tutorials show. This is personal preference. Sometimes I want that padded look, but for this piece I opted to just pin the fabric directly to the board.
Now you can see the edge completely pinned. Hint: you can use a thread in your fabric to line up with the edge of the mat!

As you pin, keep measuring to make sure that your piece is where you want it. Now is a good time to place the mat on top (or the frame if you're not using a mat) to make sure that everything looks centered and nice. Push those pins in as far as you can if you're going to leave them in there.*
Looking pretty centered! 

The above photo shows my stitching pinned all around. Turn your work so you're looking at the back. You have to make a decision now. Do you want to lace your edges or tape them? As a rule, I will only do lacing on a small project. I'm talking really small. So I'm going to tape my edges. Don't yell at me. I saw a professional framer do this. I like this method and I've used it many times.
*I have seen people lace the edges and leave the pins in, but some framers take the pins out. Up to you. I tape and leave the pins in.

OK! It's time to secure your mounted stitching into the frame. I use a Logan point driver to do this. You can also use glazier points. American Frame sends these clip things for this purpose, but I have never been able to figure out how these work. And there may be other good solutions that I don't know about. But I like my Logan point driver. A little too much.
But seriously, this device makes this step soooooooo easy. How many points you'll use is dependent on the size of the frame. You be the judge. I bought my Logan driver at Hobby Lobby (use that coupon!). You can buy point refills there or on Amazon.

I cover the back with some brown craft paper. I cut it about a half inch larger than the frame back opening and simply glue it on. Brush the glue on with a paint brush. You don't need a lot. Then I lightly spray the paper with water. When it dries, it will tighten up.
Put on a hanger of your choice, like a saw-tooth, and you're done!
What do you think? Pretty nice, huh? It's all ready to hang up for the July 4th holiday, but I'll probably leave this up all of the time.

Some things to think about. I didn't use any kind of glass or plexiglass for this framing project. Sometimes I do and sometimes I don't. If you use glass, and don't use a mat, you will need to use spacers to make a space between your stitching and the glass. You don't want the stitching in direct contact with the glass. If your stitching has any kind of buttons, jewels, or beads on it, you have to make sure that you'll have enough room for them if you're using glass.You may have to use more than one mat or use spacers AND a mat.

This tutorial is intended to give you a general idea on how to do basic framing. American Frame is the company I order framing supplies from. There are many others. Look around. Find one you're comfortable with. If you have specific questions, contact them. They may have suggestions that I did not give in this tutorial. It's always great to learn something new! The whole idea here is to do your own framing, save a little money, and have a finished product you'll be proud to display!

Monday, February 25, 2013

Frame It Yourself

The question for many of us stitchers is how we're going to finish our project once we're done stitching it.  We can find all kinds of finishing methods online, but probably the most common one is to frame it for displaying on a wall.  If you've ever had something professionally framed, you know all about the sticker shock involved with that.  There is no question that the quality of professional framing is excellent, with countless choices of mats and frames.  But if you stitch a lot and want to frame a lot, it's good to know another alternative so that you don't have to eat store brand macaroni and cheese every night because your food budget is going to the local frame shop.

I found American Frame online and made the decision to purchase some framing supplies for a small project to frame by myself.  It was surprisingly easy, and I've since framed many projects.  This company has always supplied me with very good quality frames and supplies to do the job correctly.

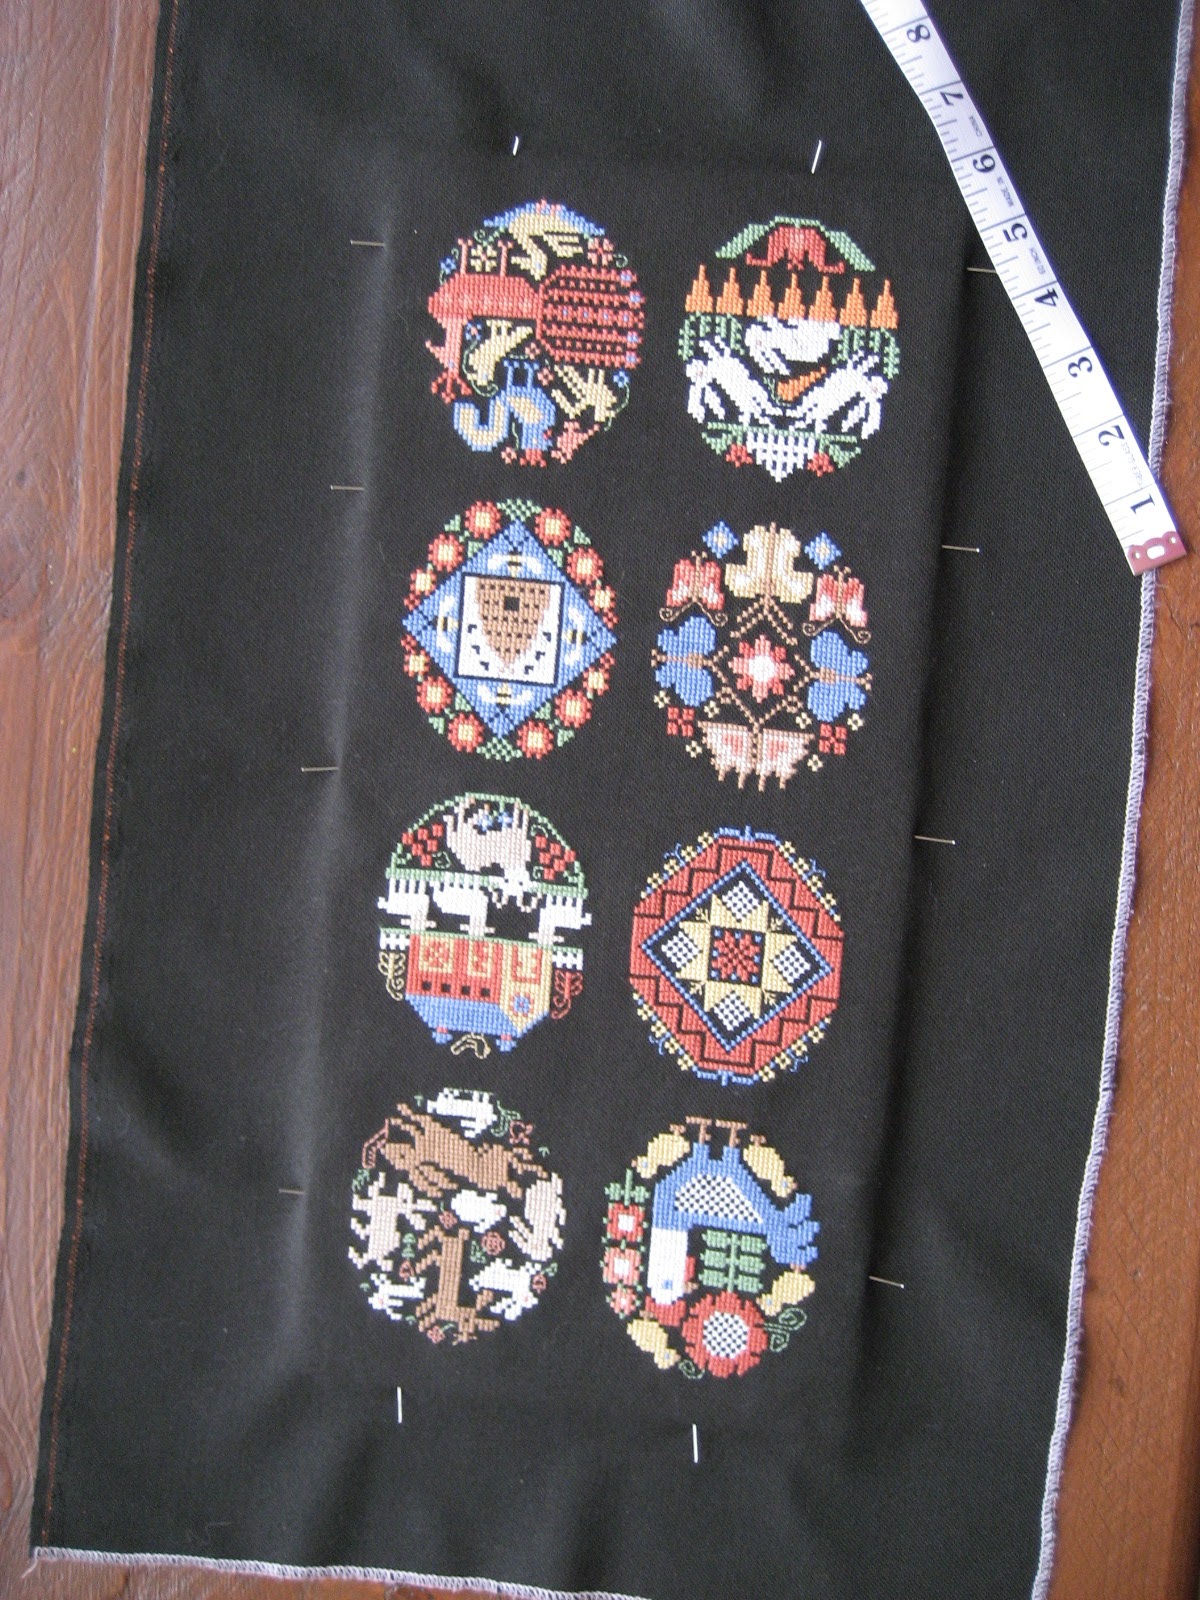
This past weekend I put my Folk Eggs into a frame and photographed the steps to help you to understand just how easy it was to do.

First, I placed the mounting board (foam core) on a clean surface and then laid the finished work on top.  Then I measured around the edges to get an even margin around the edge of the work, and began to pin.  I use silk or satin pins which go into the side of the foam core easily.  I left them sticking out for the time being. Keep measuring to make sure that the work is centered.
Next, I added pins, still measuring and when it's even all around I start pushing the pins in all the way.
Now is the moment of truth. Place the pinned work into the frame to make sure (once again) that everything is even.  Now is the time to make any adjustments.  Just take pins out a couple at a time and adjust the fabric where needed.  You don't have to unpin the whole thing.  Who wants to do that?
Looks pretty good so far
You can see that I don't have much of a space between the edge of the stitching to the edge of the mounting board.  That's because I chose not to mat this particular project.  You'll have more of a margin if you choose to mat. Now let's do something with all of that fabric.  You can trim some of it off, or leave it as is if it's a manageable amount.  I left mine as is.  Time to start taping.
I use about 1" of Terrifically Tacky (double sided) tape to stick the corners to the mounting board.  Don't pull so tight that the corners pop through the fabric!
Fold edges in one at a time and use enough double sided tape to adhere the edge.
All taped down and placed into the frame
Looks like I could have trimmed some of that fabric to have a little less bulk.  Yeah, probably, but it's not going to affect the framing and I'm not about to go and untape and unpin everything after all that.  Uh-uh.
Here's the part where I need a little help.  Those little glazier points are great for holding the work into the frame but they can be really difficult to put into the wood.  So Mark is my trusty helper at this point.  As a bonus, he also puts the sawtooth hanger on the frame.

Next, you need some kind of backing on that to keep everything clean for many years.  I use plain brown kraft paper.  Well, mine has little stars on it.  Just cut a piece a little smaller than the frame.  Brush on a light coating of white glue on the back of the frame and stick that paper on.  Then spray a little water on the paper.  Really.  When it dries, it's nice and flat.  Just a light spray, don't soak it.
And here's what I ended up with!  Once again, I'm very happy with this frame.  It's kind of a distressed, whitewashed look with tiny bows all around.  It goes perfectly with the Folk Eggs.  And, miracle of miracles, it's all ready for Easter!

As I said before, I chose not to use a mat in this framed piece.  I also decided not to use glass or plexiglass.  I use glass for some projects and both mat and glass for others.  American Frame sells these items, and also cuts everything to order for your project.

I hope that this little how-to helps you if you want to become a DIY framer.  This is just how I do framing, and I'm sure that there are other methods to each of my steps.  I'm always open to suggestions for new or better ways of doing things, and this is no exception.  So let me know what you think!