Friday, May 20, 2016

Spring Cross Stitch Giveaway!

I haven't had a giveaway in a while, so in honor of my favorite season and my favorite month, May, let's have a giveaway! 

I started this blog intending to post about all kinds of crafts, with the main focus being on cross stitch.  You've noticed lately a definite lack of cross stitch, haven't you?  With the secret cross stitch project going on, I just can't post yet.  I am really concentrating on getting that one done and am not working on any others right now.  Therefore, no stitching posts. 

To hopefully make up for that, my Spring Cross Stitch Giveaway includes a colorful chart in lovely springtime colors, fabric, floss along with a cute charm and beads.
The lucky winner of the giveaway will receive the Lizzie Kate Flora McSample chart "Heart Sampler", the 28-count Cashel linen fabric in mint, a tiny heart charm and beads, and every color of DMC floss that you'll need to complete this project. 
The fabric color is really a pretty mint green color!  Sorry I couldn't get that in the photo. 
Just look at the beautiful color combination of the floss in this project!

And all you have to do is:
1.  Follow my blog. 
2.  Comment ON THIS POST by noon EST on Friday, May 27th. 
That's it.  Nothing complicated or demanding. 

I will draw the name of our one winner on Friday, May 27th at noon, and will announce the winner right here on my blog.  I'll also contact the winner by e-mail.  Oh, I almost forgot.  Please, please, please, make sure that there is a way I can contact you!!  

Thank you for all of your kind comments.  I appreciate each one, as I do all of my followers.  If you're not a follower yet, please join by clicking on the "Join This Site" button.  

Good luck, everyone!

Monday, May 16, 2016

Crochet A Cat!

All right, let's get back to crafting, shall we?  In honor of my sweet kitty, Ozzy, my project for last week was this cute Cat Cup Cozy.  Just click on the link and you'll get to the video which contains complete instructions.
It's been my goal for quite a while to learn different crochet techniques and to break out of my "I can only crochet things that are rectangular or square" mode.  Remember?  So seeing as how this project contains something circular, something ear-shaped, and something tail shaped, I thought it would be a good starting point.

It's pretty cute, right?  The instructions say that chaining 37 will fit around a Starbucks cup, so that's exactly what I did.  I have one of those reusable Starbucks cups, but it's in my car.  Could I have gone out to the car to get it so that I could see if 37 chains would fit around my cup?  Well, yes, I could have.  Did I?  No.  I chained my 37 and then followed the instructions using Sugar N Cream cotton yarn in an off-white color. 

When it was completed, I FINALLY retrieved my reusable Starbucks cup and found out that it was waaaaaay too big for my cup (which is a Grande, by the way).  Yeah, I just had to laugh.  You know that saying, "measure twice, cut once"?  In my case with this project, it was more like "nah, you don't have to measure at all!".  And that was not a smart crafter decision. 

It does fit on my giant Tervis tumbler though!  Which makes no sense at all because:  A) Tervis tumblers are insulated already, and B)  It hides the cute design that's already on the cup (which in this case is a bumblebee).  But it does show you how cute the cup cozy is when it's actually on a cup. 
Now, as usual, I can come away with some positives even though the cozy was a bit bigger than what I needed.  I learned some new techniques, used crochet stitches that I haven't used in the past, and it did turn out looking like what it was supposed to.  And it's pretty darn adorable.  I now have the courage to attempt more adventurous projects.  Also, the instructions are very clear in the video, and this is a quick project.  You might be able to complete it in an evening. 

Hmmmm, maybe it will fit a Starbucks Venti cup.

Saturday, May 14, 2016

Saying Goodbye To Little Ozzy

We've had a very sad week.  Last Friday night, our little Ozzy cat became very ill.  He'd had some health problems in the past 6 months, but had seemed to be doing better under his vet's care.  But last week, he just didn't seem like himself and when he refused to eat his dinner on Friday evening, we knew something was wrong.  When his breathing appeared to become labored, we took him to the emergency vet where they gave us some very sad news and we knew that we would have to say goodbye to Ozzy.  He was 14 years old.
We adopted Ozzy as a tiny kitten from our local animal shelter.  He proved to be a good companion to Cosmo, even though they didn't always see eye-to-eye.  Ozzy could be a troublemaker at times.  He loved to eat.....almost anything.  I had to keep things put away like I would if a toddler was in the house.  He could "hear" food from the farthest corner of the house.  One time, when he was a kitten, I caught him climbing some mini blinds.  In his early years, it wasn't uncommon to come home to find him on top of our 6 foot high TV cabinet.  So as you can see, he was the little clown cat of the house.
Always looking for something to eat.

Cosmo and Ozzy
He loved boxes.
Even though we spent a lot of time shaking our heads at his antics, Ozzy was definitely an important part of our home.  Never a traditional lap cat like Cosmo, when he did choose to sit on one of our laps, we felt graced by his presence! 

Our other two cats, Cosmo and Moxie, have been spending quite a bit of time together, and are extra-clingy when I come home from work.  I really do think that they're missing Ozzy in their own ways.  We've now come to terms with his loss, and are sharing the silly and cute photos we have stored on our phones.  And laughing.  And enjoying our memories. 
Ozzy, 2002-2016


Thank you for listening.  Now go and give your own pets an extra hug.  I know I will.

Friday, May 6, 2016

Some Crafting By Crafty Guy

My birthday was last week, and Crafty Guy (aka my husband, Mark) presented me with my very own yarn bowl!  As you may know, he is an avid wood worker, specializing in turned wood projects.  Now, I knew that he was busy in the workshop on this particular project for quite a while.  Plus, I had seen the bowl in stages as it was being made.  But now I am the happy owner of the completed bowl.
The bowl is made from pear wood and has a lot of "character marks" and some saw marks from where the wood was originally cut. 
He was careful to make the all of the surfaces nice and smooth so that the yarn would glide smoothly through and not catch.  This was especially important in the channel where the yarn comes out. 
The bottom the the bowl even has a little indentation for the yarn ball to rest.
I just love this gift.  Now when I crochet, the yarn will have its own little place to be, and not rolling all over the couch or wherever it happens to be sitting.  I have to get a crochet project going, don't you think?

Thursday, April 28, 2016

April Pinterest Project - May Flowers

Well, spring has sprung and in a couple of days we'll be ushering in May flowers.  I've actually had a few blooms in the garden with the promise of more to come as the weather gets and stays a little warmer. 

For my April Pinterest attempt, I chose a beading project, the flower bracelet, that goes perfectly with this season.  I pinned this idea a while back and when I watched the whole video, I knew that this would be something to try.  The video and design are by Anchik Martynova and can be found here. 

I am very happy with the completed project.  It looks difficult, but beginning beaders will be happy to know that it is a fairly easy process.  I used Superduo beads in a pearl finish, 4mm gold beads for the centers, and 11/0 gold seed beads.  I love this color combination.  Also needed for this bracelet are thread and a clasp. 
The video shows Anchik using some kind of thread, but I don't know what it is.  OK, let me back up here.  Yes, I know that the video is in Russian.  Don't panic.  The visual instructions are so clear that you'll see every step.  But the thread?  It looks kind of like nylon thread, although I can't be sure.  Then she does something with a lighter, which I think is the equivalent of tying off the thread.  If I used a lighter that close to my project or my hands, something would be injured. 

First you make the individual flowers, then you'll put them together to make the bracelet.  For the flowers, I used Nymo thread, and used Fireline to assemble the bracelet.  I avoided disaster by tying off the thread ends and then weaving them back into my work. 
The verdict:  YES, I would make this bracelet again, and would encourage my fellow beaders to give it a try too.  It's summery and cute.  I can imagine it in all kinds of different color combinations.  So many possibilities!  It was easy to make; I'm going to say that this would be suitable for beginner/intermediate, with the beginner having some beading experience.  But even if you're a complete beginner, go ahead and try it.  What have you got to lose?  Anchik's visual instructions are so clear and understandable.  Watch the video all the way through first. 

Thanks for checking in.  I love getting comments, and appreciate every one of my followers.  If you're not a follower yet, please consider clicking on the "Join This Site" button and becoming one!  Come back and visit soon.

Friday, April 22, 2016

A Collection Of Collections

As I work on my secret project that I can't show you yet, I thought I'd break from the craftiness and show off some of my collections.  I was reading some of my favorite blogs, and came across this post from the blog Dirty Martini Queen's Musings.  I enjoyed reading about and seeing pictures of her collections so much that I decided to do a similar post. 

Recently I was reading a book in which one of the characters pretty much said that collections are for nerds.  Huh.  So thinking that something is so pretty, fun, or interesting that you want to acquire a bunch of them is geeky?  Oh well, then that makes me one because I have a few collections that I'm enthusiastic about.

My oldest collection is one of miniatures.  I started collecting these years ago, way back into my childhood. 
Some were gifts, some were picked up on vacation.  There are a lot of Red Rose Tea figurines and stuff I got at antique stores.
Yes, I even have the Crown Jewels.

As many of you know, I love beads.  I used to go to an antique market where one of the vendors sold the best vintage beads.  Really cheap.  I put together quite a collection of these and keep them in a beehive-style jar.
One of my collections that I should do more research on is my group of Homer Laughlin custard cups. 
Yes, it's a tiny collection, but these aren't easy to find.  I found most of these at antique stores, and a couple of them are from Ebay.  It's a pretty happy find to see one of these sitting on a shelf in a vintage shop!

Another collection that goes way back to childhood is my collection of tins.  These are also very useful for the crafter as they make great little storage containers for anything small.
This isn't even all of them!
And what about scissors?  I have heard of other stitchers collecting embroidery scissors and have managed to amass a few myself.  I know that some people think this is nuts, but you've got to admit that they are pretty.  And useful.
Did you notice the empty flower frog just waiting for more scissors?
So that is my collection of collections.  Thank you for not laughing at me.  Or maybe you did.  The funny thing is that I'm not really actively collecting any of these things anymore.  At some point, the collection becomes either complete or enough.  Oh, I suppose that if I spied a Homer Laughlin custard cup somewhere, I'd gladly bring it into the fold.  Or possibly an interesting pair of scissors.  There IS that empty flower frog.....

I also have a collection of cross stitch charts, but that's another story for another day.

Friday, April 1, 2016

March Pinterest Attempt - Another Tiny Sewing Project!

What?  Did you think I missed a Pinterest attempt?  As a matter of fact, I did do a project for the month of March.  I'm just a little late in posting.  So no April Fool's Day prank here.

My last post was all about my stitch group's spring retreat.  For the past few retreats, I've created a little gift for each person in the group to commemorate the occasion.  This time, Pinterest yielded a cute little idea for a "Snappy Card Wallet" that was so appropriate for our group.  You see, each month when we meet for our regular stitch day, we do a gift exchange.  Our gifts range from the practical to the whimsical.  We draw numbers for the order in which to choose, and then we're allowed to "steal" from each other after a gift is opened.  It isn't as mean as it may sound, and we all ultimately love the gift we get. 

One of the most popular gifts brought to stitch day is the gift card.  It could be from Starbucks, Joann's, Hobby Lobby, Barnes & Noble, Cracker Barrel, among others.  My idea was to make one of these little card wallets for each of our group members so that they could keep their gift cards in them.  See?  How useful!

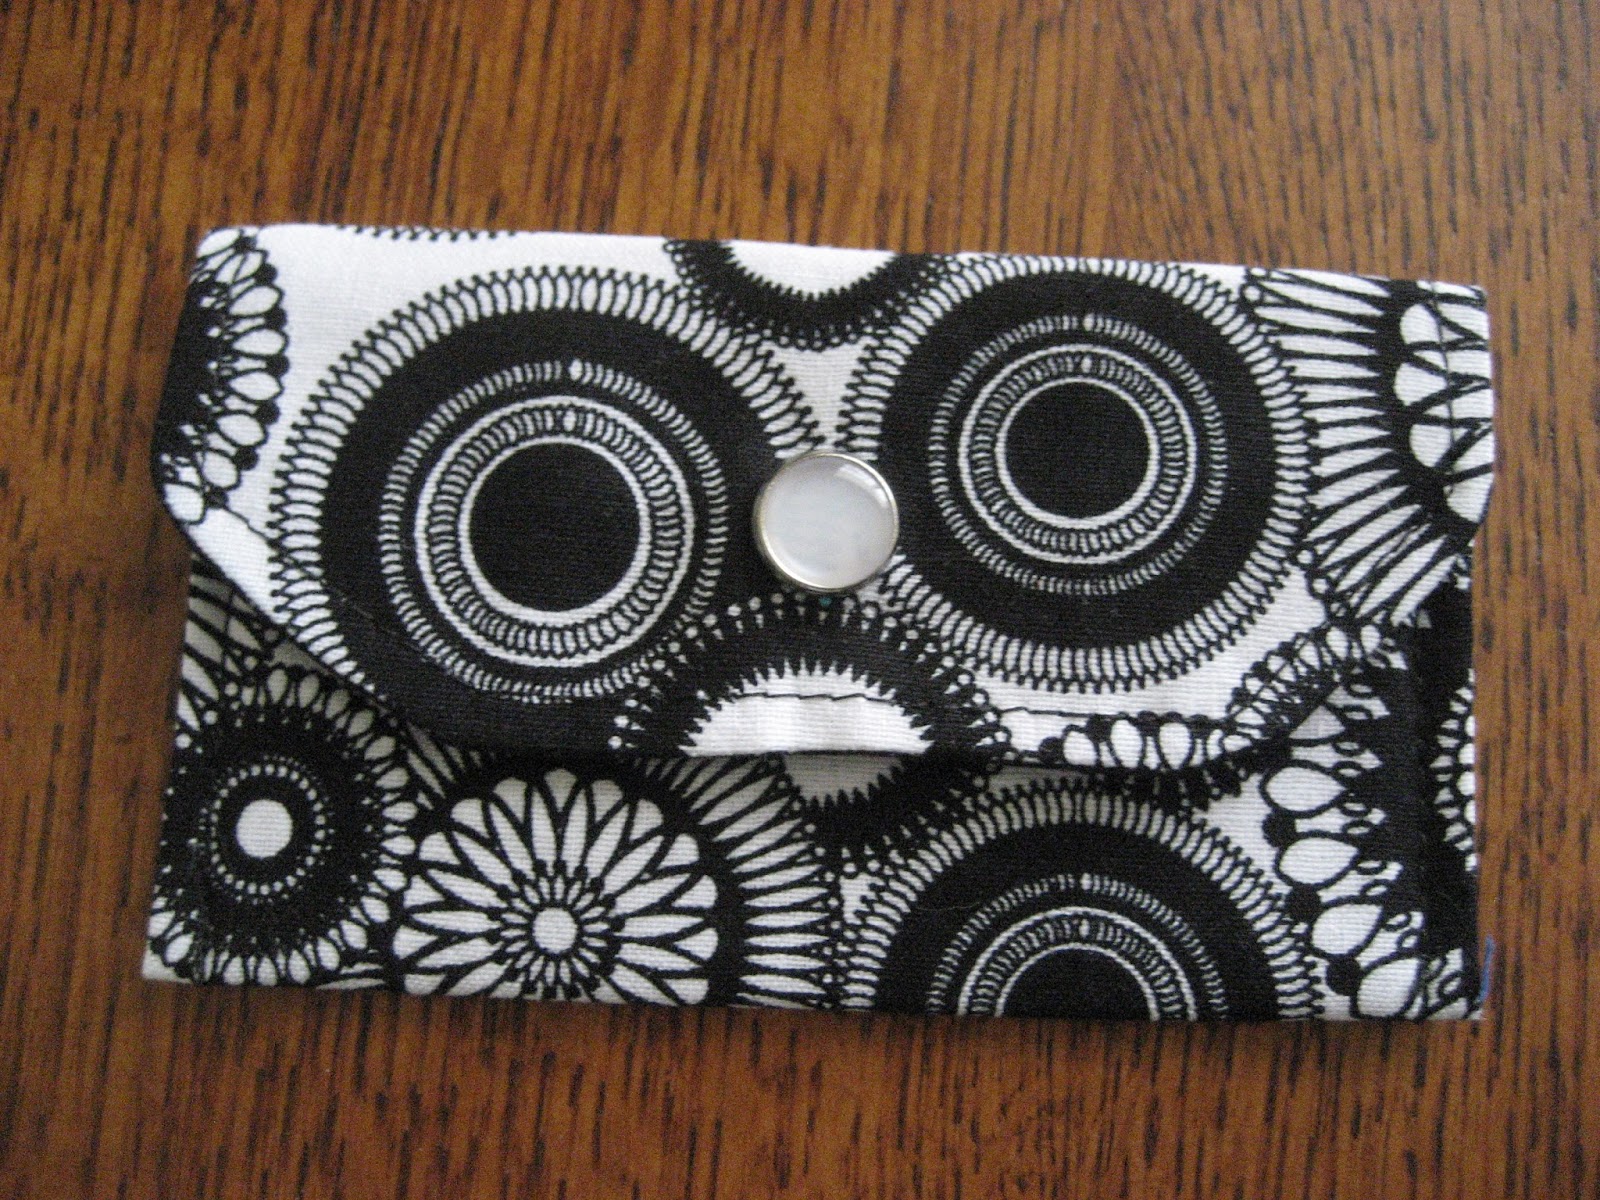
I just followed the instructions on the video to make a bunch of these.  In the excitement of getting ready for the retreat I forgot to take a photo of all of them, but have these three with me to show you.  I'll tell you why in a minute.
Yes.  I know.  This one looks like it has eyes.
These are a great way to use up fabric scraps that you may have, which is exactly what I did.  I only had to buy some of the Dritz Snap Fasteners for this project.  The rest I had on hand. 
NEW SKILL ALERT! As I had never tried to attach these snap fasteners before, I found a useful YouTube video here to learn how.  The process was easy, but don't do this on good furniture because it will leave a mark.  I used an old wooden cutting board to hammer these snaps on.  In my misguided attempt to protect the cutting board (?????), I put a piece of felt under the fabric and proceeded to hammer away.  The result was that some of the snaps didn't join strongly enough and pulled right out when opened.  Big mistake.  But it was easily fixed when I just hammered those snaps into the fabric directly on the cutting board.  So two of the wallets you see above were in for repairs. NOTE: I will say that when you're applying the pearl part of the snap, you may WANT to put some felt under that so that it won't be damaged.  Just make sure that you hammer that part in good.  This wasn't the part of the snap that I had problems with.  The little snap fastener kit came with a piece of felt for that purpose.  The kit also comes with a little setting tool that holds the snap in place and makes it easy to hammer in.

This was a fun and fast little project to make.  As soon as the fabric was cut out, the sewing part was easy.  And the snap application was a snap (ha ha), when I followed the instructions.  These little snappy wallets are suggested for business cards, but I don't have a business card for work.  I suppose I could get one that says "Awesome Crafter" or "Accomplished Stitcher".  Or how about "Worthy Blogger"?  No?  I guess I'll use mine to keep my gift cards safe.